WooCommerce
If you are already using Woocommerce with your online store, Limepay can be added quickly and easily.
Installation
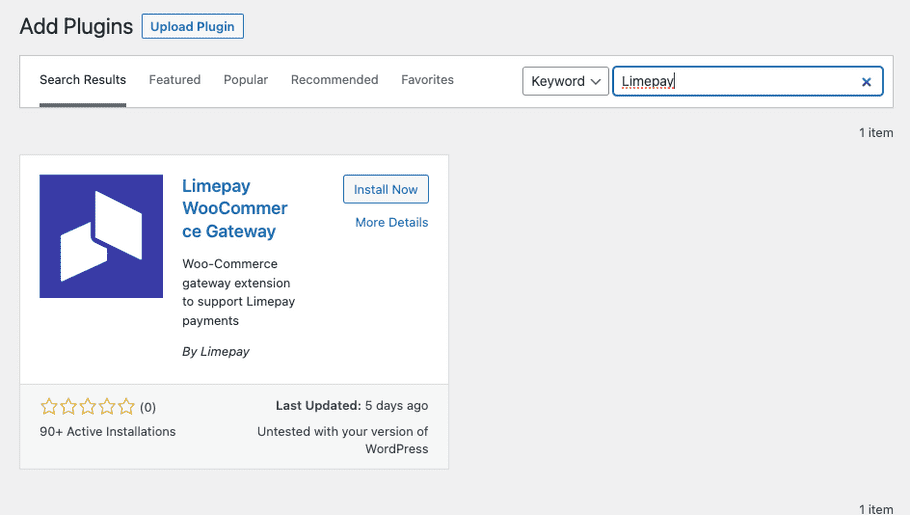
- Log in to WordPress admin panel and click on the Plugins option on the sidebar.
- Use the search box on the top left of the page to search for Limepay.
-
Find the Limepay Woocommerce Gateway option and click “Install now”.

- Once installed, click “Activate”.
Woocommerce Setup
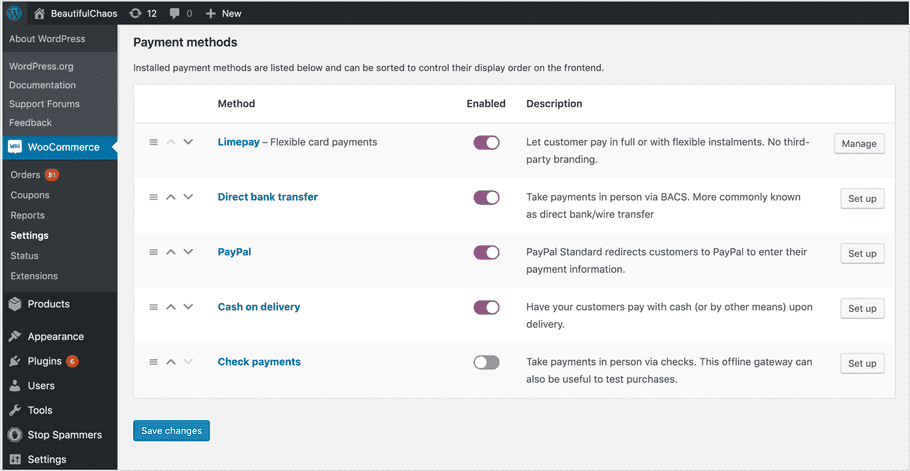
- Click on the “Woocommerce” option on the Wordpress sidebar and then the “Settings” option.
-
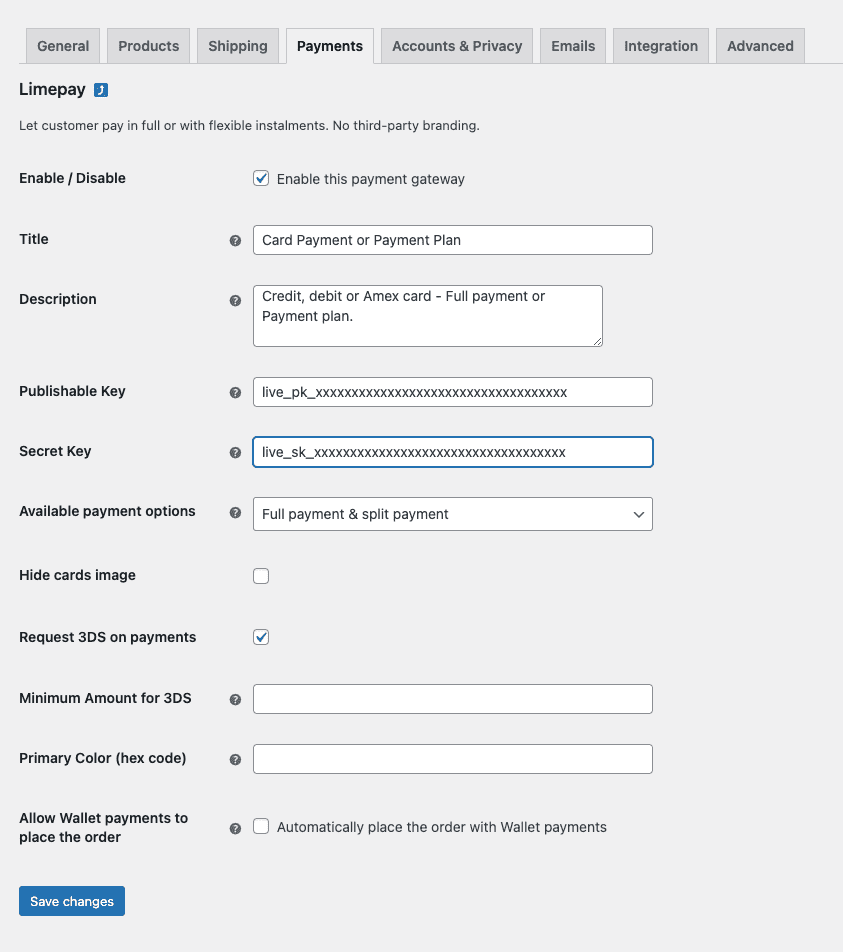
Enable Limepay, then click “Set up”.

- Enable/Disable: Enable Limepay.
- Title: Set the title as you prefer.
- Description: Payment method description.
- Publishable Key: Limepay publishable API key.
- Secret Key: Limepay secret API key.
- Available payment options: Select your preferred payment options to be available in checkout.
- Hide card image: Show/Hide card image next to title.
- Request 3DS for payments: When checked, Limepay will be requested to perform 3DS challenge for payments.
- Minimum Amount for 3DS: [Optional] When an amount is set, 3DS challenge will not be requested for payments below the given amount. Leave empty if you intend to request 3DS challenge for all payments.
- Primary Color: [Optional] Primary color of the checkout. Enter the hex code of the color.
- Allow Wallet payments to place the order: When set to Yes, Limepay will submit orders immediately when a digital wallet payment such as Apple Pay or Google Pay is selected.
- Click “Save changes”.
-
Return to Woocommerce > Settings and move Limepay to the top of the list using the drag and drop function or the arrow buttons.

- Return to and refresh your store page to see your new Limepay checkout.
Enable ApplePay and GooglePay
To enable ApplePay and GooglePay, please follow the instructions available in your Limepay Merchant Dashboard's Settings -> Configurations -> Checkout payment options section.
What's next?
Visit the testing documentation page to confirm the integration is fully functional.
Learn about and access the Limepay merchant dashboard.